
SLIDING ON CLAY – training approach on and off the court

As every modern sport, tennis game is also becoming faster and more powerful by putting higher athletic demands on players who, between other things, have to show strong defensive skills in order to win the points. Being able to return more balls and cover the court faster is absolute must when playing on the highest level. In order to achieve this players must be able to slide. Sliding can be seen most often on clay, however the best players are able to do it even on other, more difficult surfaces to slide on such as hard courts.
“Your footwork and balance on clay are probably more important than on any other surface.” – Nick Bollettieri
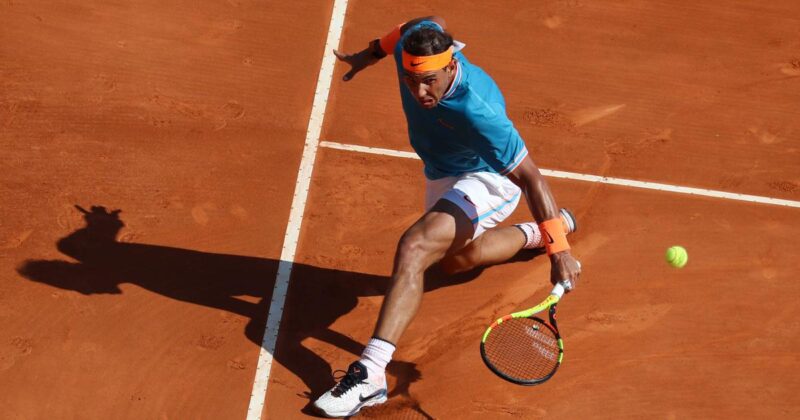
Clay courts are meant for sliding, and top players employ this motion as part of their strategies. Sliding in the most situations is used when the player is in a defensive position, but can be used when there is a need to find better position to hit while dictating rallies. Because all of this, we must understand that sliding is a technical gesture that can and must be addressed in training.
Different sliding strategies on clay
Sliding before hitting the ball – allow players to get into a better position to hit, and are able to recover fast after the shot. This usually occurs when players are rallying or when they are in command during the point
Sliding during hitting the ball – is the situation when players have less time to hit the ball and therefore recovery step will be delayed – they are already defending
Sliding after hitting the ball – is less desirable because like this players loses the court. This occurs when players are defending to stay in the point.
“I think the difference between good sliders and bad sliders is the good ones slide into the ball, and the bad ones, in general, keep sliding after the shot” – Mats Wilander
Different type of stress on muscles and joints
In general while playing on the clay, players need to have a wider base. While keeping wider base they are more stable, slide more easily and reduce the risk of falling. Sliding is a movement where a slightly different muscular impact is created in respect to when moving on other surfaces.

- Adductor of the non-dominant leg works in an isometric/concentric way to help stop while sliding
- Foot / ankle complex of dominant leg must be stiff in the plantar flexion position in varying degrees for more efficient sliding while plantar flexors work excessively in isometric/concentric mode
- Quadriceps in the dominant leg is stimulated in isometric/eccentric mode while battling with eccentric forces during sliding
Gym training strategies for more efficient sliding
Now when we understand which kind of stress on the specific joints and muscles sliding is producing, we can create approach to training outside the court to facilitate sliding on the court.
This exercises is targeting adductors in isometric/concentric way with additional shoulder-hips separation by working on rotational core strength. Just be sure you select correct Swiss ball dimension to simulate wide stance at the hips.
2) Low rotational row
With this one main target is the front leg where we can use different angles at the foot position (eversion/inversion) while keeping proper plantar flexed position to simulate sliding stance. In addition there is again rotational core stimulus.
3) Slider Cossack squat
The slider Cossack squat will tell you a lot about your athlete hip mobility, single leg balance plus glute and adductor strength. If you find difference between the legs be sure to address it correctly, this will create a positive transfer on the court.
On court sliding practice
The best way to practice sliding is simple, try to slide during tennis practice!
But many times is not so simple, players can be more confident to slide on 1 leg, sometimes they can’t slide at all on one side of the court – most common example is for the right handed player, inability to slide on left leg from the open stance in the backhand corner. That’s way we can incorporate drills to facilitate sliding on court. This exercises can be done as a warm up before tennis session, during practice to strengthen the motor pattern of sliding, or can be used as conditioning drills.
- Open stance sliding
- Closed stance sliding
These two drills falls under category slide before hitting the ball. Watch carefully if there is a difference between legs when sliding in the stability, length of slide, position and execution of the racket swing.
- Sliding to catch the ball
This exercise is teaching player to slide and hit, or to slide into the shot. Between all other things necessary for optimal sliding, proper timing is something we can train in this exercises example.
- Resisted sliding
This one we can use as a drill to strengthen recovery step to be able to recover the court as fast as possible after the shot. In this example is done as a specific conditioning drill.
You simply cannot move effectively on a clay court without mastering the specific art of sliding! Good training everyone!